

Introduction: Midi Controller Button-Keyboard


Inspired by my midifighter project, I set out to make a button style midi controller that takes advantage of the many digital inputs that the Mega Arduino board has. In this Instructable we will walk through the steps taken from gathering materials to making music!
Step 1: Gather Materials
For this project I used:
Arduino Mega (clone)
22 gauge wire
16 large white arcade buttons
10 smaller black arcade buttons
Soldering tools
Drill with 16mm & 26mm drilling bits
Saw
Mounting board
Step 2: Drawing and Drilling
You will need to mock up your buttons on whatever you are mounting them to, I found this piece of wood in the trash and I thought it would be perfect for this project. You might want to do the same or go to the hardware store.
Trace out the buttons and mark where to drill the holes and bust it out. As you can see later the bottom gets pretty gnarly looking. You might want to test the button's fit before you drill all the holes.
I sawed my board in half later on, but I would suggest doing it at this stage.
Step 3: Proof of Concept
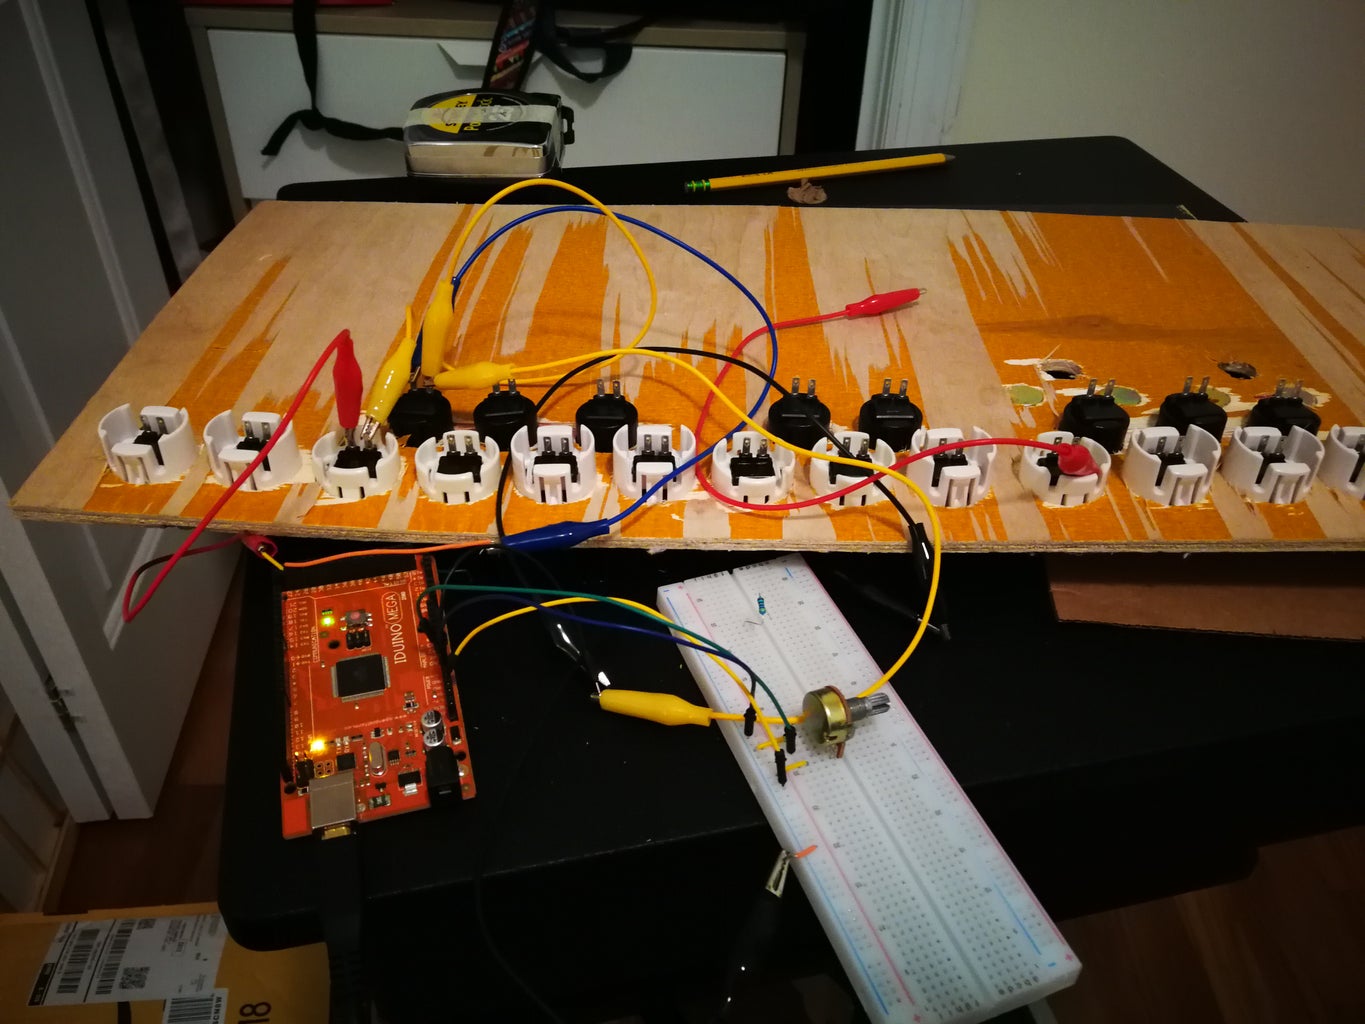
I ran some alligator clips to a few buttons and set up a 10K pot and uploaded the code to test it out prior to soldering. This isn't 100% necessary, but it is a good idea if you like to double-check things.
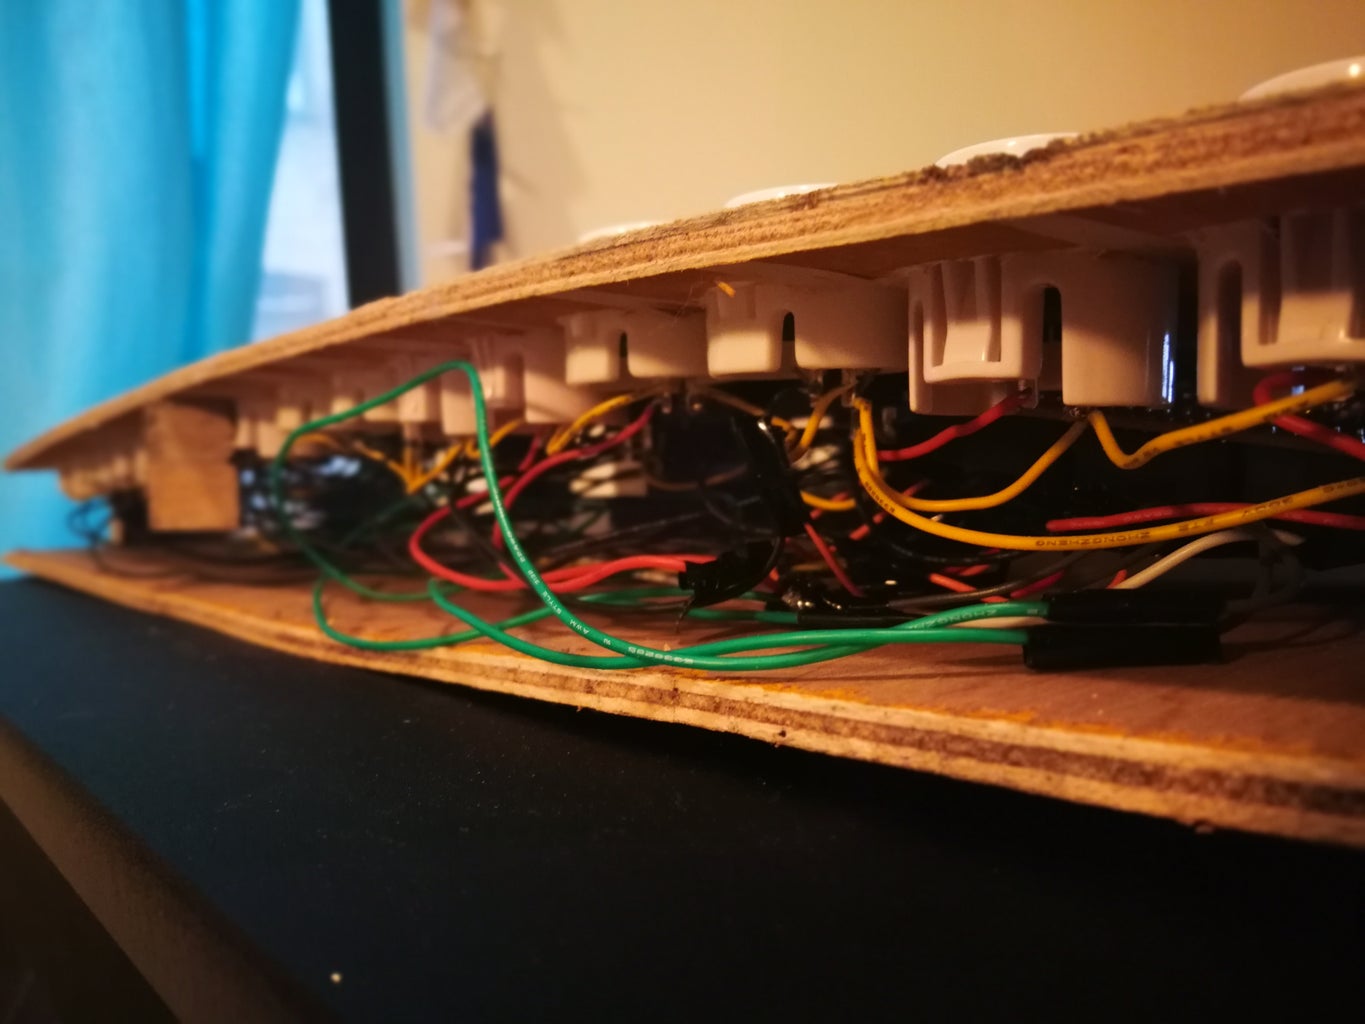
Step 4: Solder
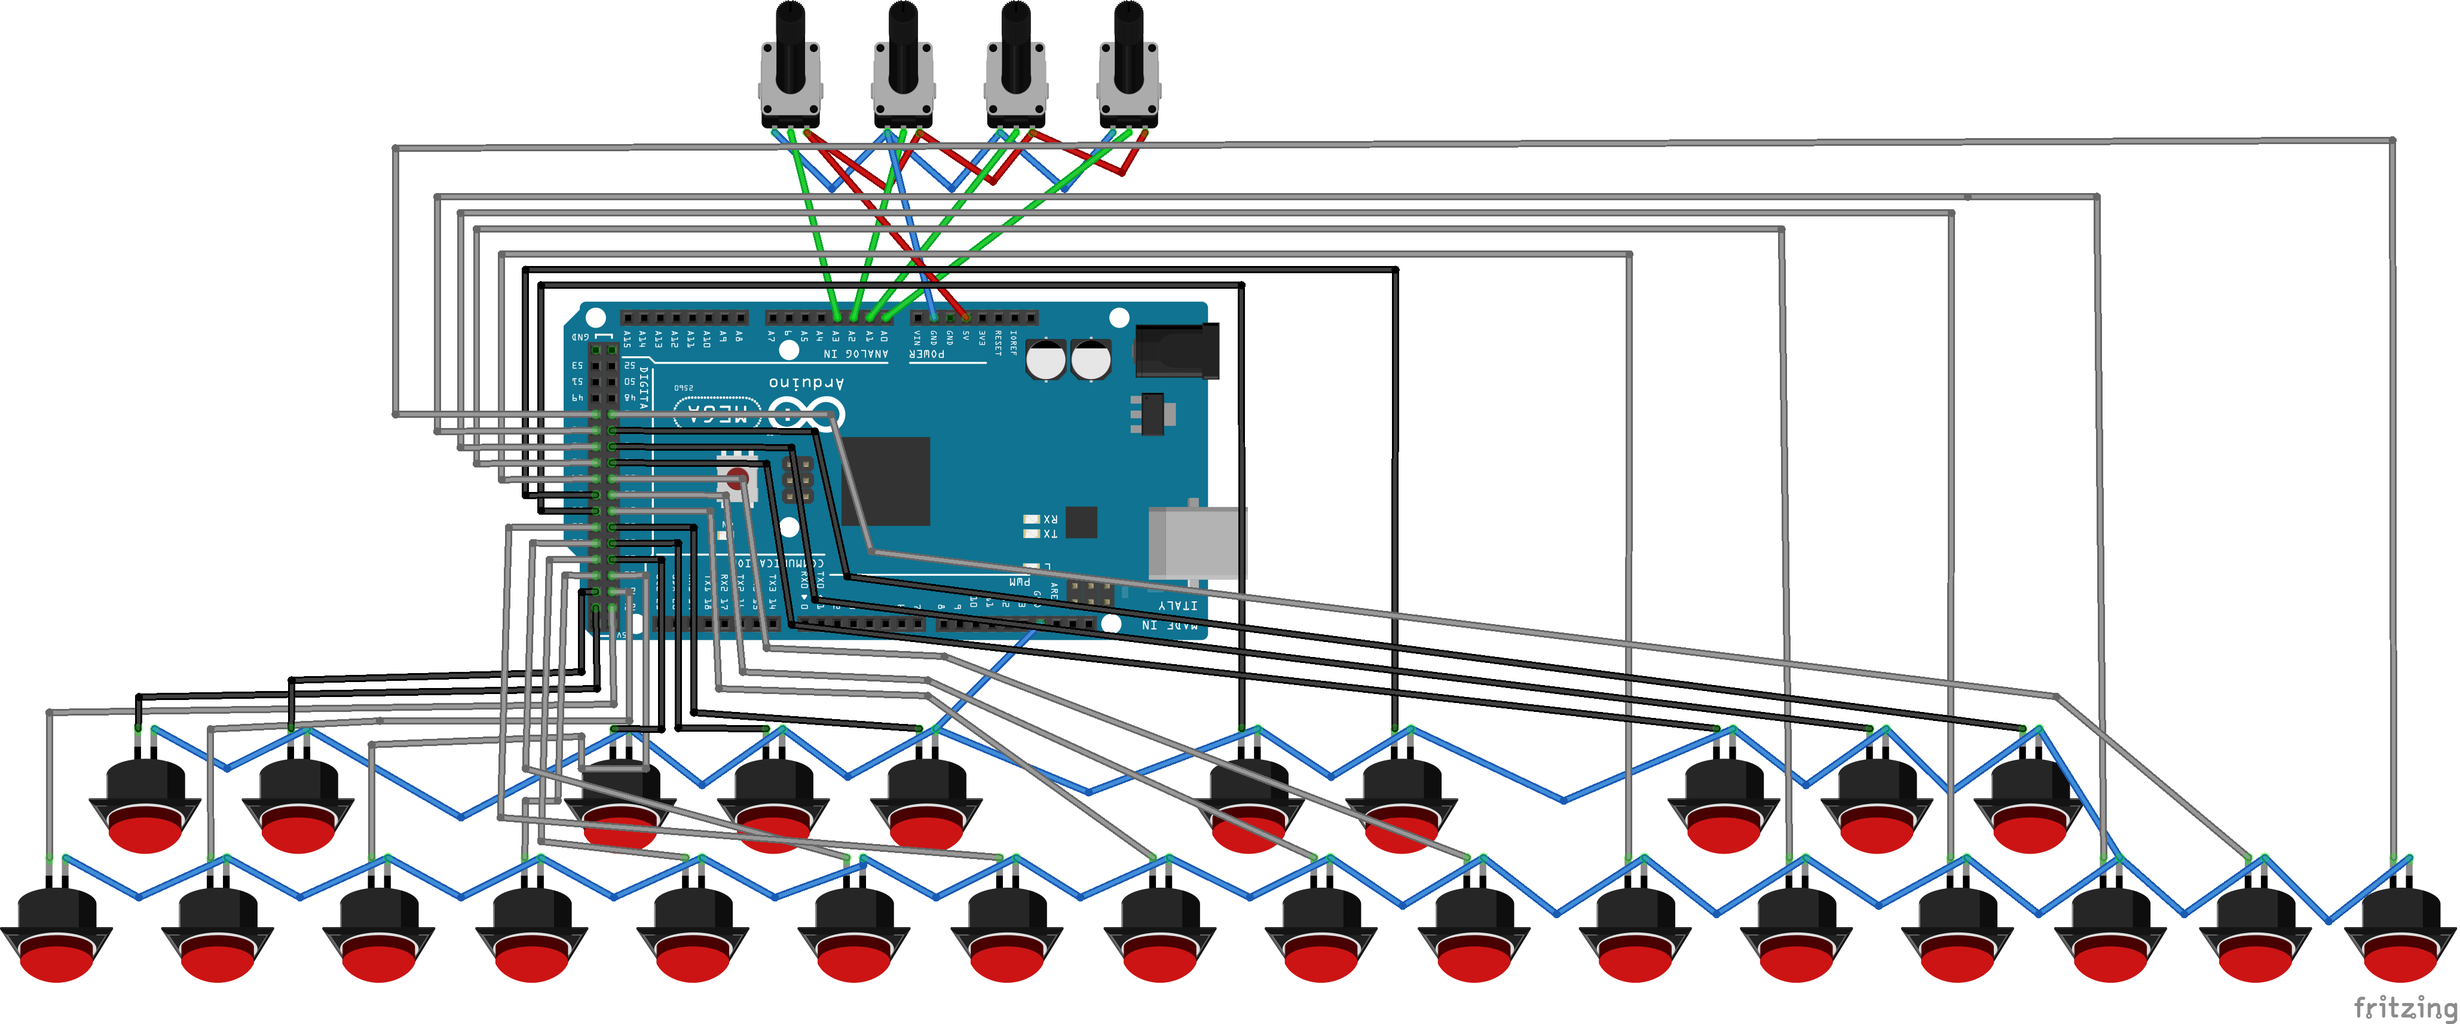
There is a lot of wires going to the digital pins here, I might try and use a multiplexer next time but it really isn't too bad, just double check thing as wiring progresses. The code will specify the starting pin to be 22 and the buttons increase chromatically by one (so C=pin 22, C#=Pin 23, etc.). In the diagram you can see the buttons are all grounded together in a big chain.
The pots get power from the 5v pin and are chained together with that. Likewise, the pots are grounded in the same fashion as the buttons. Lastly, run the data wires from the pots to A0, A1, A2, A3.
You could really go nuts if you wanted more buttons or pots... and I would encourage you to do so!
Step 5: Code
Before you put the code in I would like to thank Gustavo Silveira at www.musiconerd.com as I used his code on a previous project and modified it for use in this one.
I am running Hairless Midi on my Macbook to convert the serial signals to midi signals that Ableton Live will receive.
I will admit it took some time to fully set up the serial-midi software to the point where it was working flawlessly, but I haven't had an issue since I have had it set up in it's current config.
I'm a novice coder at best but if you follow the comments in the code of the Arduino IDE and be sure to match up the baud rate of the code and Hairless midi then you should be up and running without too much troubleshooting.
Attachments

Step 6: Jam!

I like to use Ableton Live as the midi-mapping flexibility really caters to instruments like this. Here is a link to me playing along to some Mussorgsky!
My first instructable!


