

Introduction: Unicorn Horn With NeoPixel LEDs & Arduino Lilypad


Hello everyone,
Today I'm gonna make 3D Printed Unicorn Horn. I saw and did the project in Adafruit's website about a year ago but I could not find an opportunity to share it. It looks great when going out to the party and especially in the evenings. :)
I got the horn out of the 3D printer on the project. If you do not have a 3D printer, you can make the horn yourself with the materials what you want.
Let's start !
Step 1: Materials:

- NeoPixel Stick (x2)
- Lilypad (x1)
- USB Serial Converter (x1)
- Lipo Battery (x1)
- Lipo Battery Connector (x1)
- Micro USB Cable (x1)
- Female Female Jumper Cable (x6)
- Hat
- Some Cotton
- Unicorn Horn
- Needle-rope
Step 2: Upload Code to Arduino Lilypad


- First we start by uploading the code to Lilypad. Let's do the connection of USB Serial Converter - Lilypad as in the image.
- Plug one end of the Micro USB into your computer and the other into the USB Serial Converter input.
- Open the Arduino IDE. In the Cards section, select your Lilypad and port number and load the code Arduino.
You can find the code at Github or from here. Link: https://bit.ly/2MD5nSu
After we upload the code to Lilypad, we are done with FTDI and micro USB.
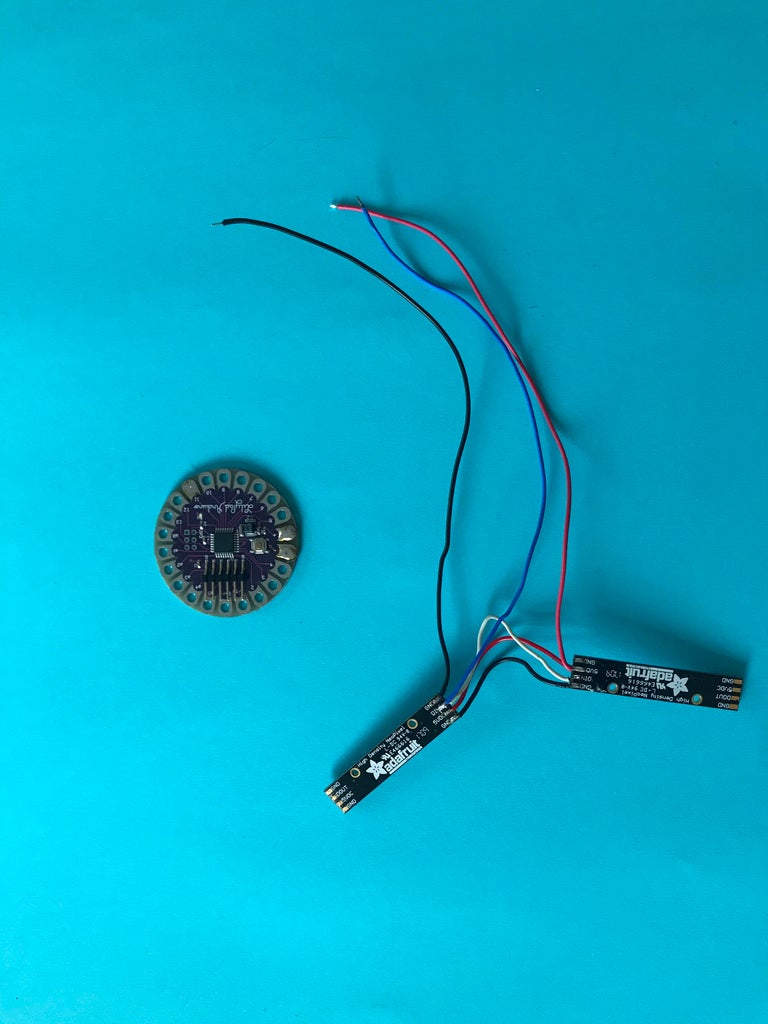
Step 3: Connection of NeoPixels


- First we connect NeoPixels with each other.
* What we need to pay attention in this section is to solder the short cables while connecting the NeoPixels.
* While doing NeoPixel and Lilypad connection, the cable is soldered a little long so that this can easily placed in the hat.
- Solder the GND, DIN, 5V pins of the first NeoPixel to GND, DIN and 5V of the second NeoPixel respectively.
Step 4: NeoPixel-LilyPad Connection


- Solder the GND of the first NeoPixel to the (-) pin (minus pin) of the Lilypad.
- Solder the second NeoPixel 5V to the (+) pin (plus pin) of the Lilypad.
- Solder the DIN of the second NeoPixel to pin 11 of the Lilypad.
Our links are ready!
Step 5: Lilypad - Lipo Connection


- We will solder JST Lipo cable to the (+) plus and (-) minus inputs of Lilypad.
- Solder the red cable of the JST to the (+) plus pin of the Lilypad, and the black cable of the JST to the Lilypad's (-) minus pin.
Step 6: UniCorn Horn & Hat


- You can reach 3D design of Unicorn horn by the link. Link: https://bit.ly/2MFbnKj
- Put a hole in the front of the hat where the NeoPixels can pass. I pulled out the seams on that part, so the hat was not damaged.
- Pass the NeoPixels from here. Wrap some cotton around of NeoPixels to distribute the lights homogeneously.
- Place the Unicorn on the horn and sew it in the hat from the holes.
Step 7: Sewing to the Hat


- Place the Lilypad in the gap in the inside of the hat and then sew it in several places to fix it.
- Place the Lipo battery in the cavity inside the hat and sew it up as the same way.
- As in the image wrap the Lilypad and Lipo battery connection cables are visible from the back of the hat.
Step 8: Wear It !

After the sewing process is finished, Lilypad and Lipo battery are fixed to the place, you can attach to your hat.
And our project is ready ! When going to the party or going out in the evening, remember to pick up your Unicorn horn hat ! :)


