

Introduction: NRF24L01 : Fixing Connection Issues


Some cheap NRF24L01 modules are affected by connection issues. This can be solved by following these simple steps.
Step 1: The Error
Many of us have been in the following scenario: You are ready to implement wireless communication in a project, you have already connected the modules, loaded the corresponding sketch to your Arduino, and when you try to test everything... It doesn't work. Your modules can't receive and/or transmit data.
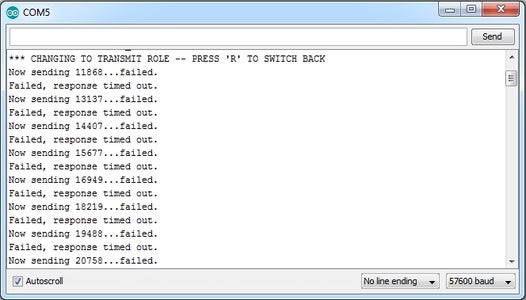
The error shown in the screenshot corresponds to the Getting Started sketch, one of the examples included in ManicBug's excellent RF24 library.
If you have already checked that the connections are in the right place and the problem still persists, then it's time to make a few adjustments to your NRF24L01 module.
Step 2: Cleaning the Pins


Due to some manufacturers' poor soldering quality and improper storage, some modules might end up with a grey "crust" over the pins and the underside of the crystal oscillator, as seen in the above photos. This crust can affect the conductivity and/or create electrical noise.
Using a small flat screwdriver or a toothpick, carefully remove the crust. Then, wipe the remaining dust using a dry cloth.
Step 3: Solder a Capacitor


Solder a 10 uF electrolytic capacitor to pins 1 (GND) and 2 (PWR) of the module. Take care to align the positive lead of the capacitor to pin 1 and the negative lead to pin 2.
After you have finished soldering it, trim away the excess leads.
Step 4: Try Again!

Connect the module back to the Arduino and try to run your sketch again!


