

Introduction: LoRa-Tooth: Small Wireless Sensors


. . . . . . .
[update]: Added more sensors here:
https://www.hackster.io/erictsai/lora-tooth-small-ble-sensors-over-wifi-lora-gateways
. . . . . . .
Motivation
Today, we have a lot of tools for building wireless devices. The ESP8266 is probably on the top of the popularity list. It ticks off a few important requirements
- Accessible: really cheap, lots of people can afford the $4 ESP8266 on ebay
- Community: large ecosystem of sensors and peripheral support because of Arduino
- Integration: easy to integrate into other platforms using protocols like MQTT
- Low Complexity: Easy to use IDE, not much tool chain setup
- Hardware exists, and in useful form factors (easy to build with)
All of these factor contribute to maximizing "makability". The ESP8266 and other WiFi microcontroller boards make it easy to build IoT devices where power consumption and size are not important factors.
But today, it's still a big challenge to build practical battery powered sensors. It's still hard to make a DIY open/close sensor for a door or window - one that's small, not ugly, will last for a couple of years on a coin cell battery, and can be built for less than $10. There doesn't exist a platform that has the same makability features as the ESP8266 for battery powered projects.
I've seen herculean efforts to make the ESP8266 battery powered, but those approaches typically sacrifice too much (physically too big, still not energy efficient enough, or lose the ease of programming and peripheral support because of switch to IDF and proprietary radio protocol). Some people just give up and use a bunch of wired ESP8266 sensors, even for doors and windows. Other wireless sensor projects use 433MHz or 915MHz transceivers and an ATtiny, but still end up kind of big and not low power enough for what I need.
The popularity of the Amazon Button is evidence of these challenges. It's still hard today to DIY a simple IoT button that won't cost more than the $5 Amazon Button. The popularity of the Amazon Button hack, given its very limited functionality, is proof that we need better platforms to build battery powered IoT devices. We need a small, low-power platform that checks off all of the same features as the ESP8266.
Enter the Nordic nRF51822
Let me tell you about this BLE modules that's been flying under the radar of the maker community. It's the nRF51822 from Nordic Semiconductor. For reasons I don't understand, this Nordic BLE module is available from quite a few sellers on eBay and Aliexpress. And it comes in a few useful form factors that make it easy to build with. And it's pretty cheap.
- They come in smaller low pin count modules, as well as larger high pin count modules.
- They all run from 3.6V down to 1.8V directly off Vdd, perfect for the discharge curve of coin cell batteries. No need for external voltage regulators.
- Low sleep current of 4uA.
These BLE modules are really easy to program with MBED. You don't even need any special hardware, you can use a Raspberry Pi to flash the firmware. More on that later.
That round "Button Beacon" is a nRF51822 BLE module with exposed programming pins, integrated coin cell holder, and an integrated BUTTON! You can buy it and use it as an Amazon button without having to modify any hardware. You just need to program it with the firmware.
The firmware.
That's why I'm writing up this project. I have some ARM MBED projects for these cheap BLE modules. The sensor firmware does things like read I/O, package up the sensor data into a Bluetooth advertisement, and then send those BLE advertisements to a WiFi or LoRa gateway, then to a MQTT broker.
------------------------------------------------------------------------------------------
My goal is to architect an "ESP8266-esq" platform for battery powered sensors. It involves a bit more complexity and network architecture, but that complexity can be isolated to the canned code that forms the scaffold others could use to make their own projects.
So, this is another wireless sensor project, but with serious focus on
- small, makable, practical BLE sensors
- low power, for real
- Community Platform & Low Complexity: using mBED, a platform with a large community support for I2C/SPI peripherals, and doesn't require hours spent on setting up IDE and tool chain.
- inexpensive components, so that as many people can make as possible
- flexible wireless architecture to extend BLE to meet long range wireless needs
- integration examples for making fancy dashboards and interfacing with other internet services to react to sensors
I'll detail the building process for making a series of sensors using this architecture.
- open/close sensors for doors & windows
- temperature / humidity sensor
- dog food sensor (Did I forget to feed the dog? How much food is left?)
- simple "Amazon Button" to do stuff (turn on lights, sent a text message, etc)
- Geolocation (what area of the house does the cat hang out in during the day?)
And it's important that the DIY sensors not have the DIY look.
Step 1: Architecture


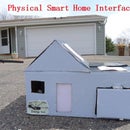
Before jumping into the mechanics of building the sensors, let's describe the architecture and the hardware choice. If we want something that's small and battery powered, we have to sacrifice wireless range. So with Bluetooth sensors, I'm using a couple of ESP8266 WiFi modules to act as gateways. A few of these gateways spread around the house should provide enough coverage to ensure you can see any Bluetooth sensor from at least one WiFi Gateway. With my house, the sensors can pretty reliably transmit through one room between the gateway and sensor, so I only need two gateways. The floor plan below isn't my house, but just an example of how these gateways might look spread around a sea of sensors.
The BLE-WiFi Gateways are composed of 2 parts: a Nordic BLE module that scans for sensor data and outputs the data as JSON string. And the ESP8266 that takes the JSON string as input and iterates through the key-value pairs, publishing this data as MQTT.
Hardware wise, you can use any of the Nordic BLE modules shown previously. In the picture below, I'm using three different BLE modules combined with the ESP8266 to form gateways for BLE. All three are functionally equivalent. The gateways just need to be plugged into a USB phone charger to power it on all the time.
So you'll need these parts:
The hookup is pretty simple, you just want to power the BLE module from the ESP8266, and wire the serial output from the BLE module to the serial input on the ESP8266.
The code for the ESP8266 is located in my LoRa-Tooth github project, and can be programmed with the Arduino IDE. The code for the BLE portion of the gateway is on mBed. The details on uploading firmware to the BLE module using mBed is given in the next step along with the sensor build.
The wireless BLE data is published as MQTT data on a Raspberry Pi. The general idea of turning wireless sensor data into MQTT is a pretty well established design pattern for IoT projects. Here's a clip of me subscribing to everything on the MQTT broker of my Raspberry Pi and seeing the stream of BLE sensor data.
We need something to provide the visual and processing elements for this MQTT sensor data. This is where Node-RED, OpenHAB, and InfluxDB/Grafana can be used. They can subscribe to MQTT topics and do something - display the data in a nice chart, send an email if sensor value goes above some number, etc.
So that's the general idea. The next step goes into more detail on building the BLE sensor, mBed, and how BLE works.
Step 2: Example 1 - BLE Door/Window Sensor


I'll cover more details on the BLE portion of the project in this step. The basic steps are:
1) Buy BLE modules for the sensor and gateway
2) Program BLE modules using mBed online compiler and OpenOCD
3) Put the hardware together.
Shopping
The Nordic nRF51822 modules are all about $5 each. Search eBay or Aliexpress for "nRF51822", and look for modules that look like these. Although any nRF51822 will work (we only need a couple of I/O pins), pick this board because it's the smallest and fits nicely in the enclosure I've picked out. You'll need two nRF51822's; one for the sensor and one for the gateway.
While you're at it, buy some of the enclosures and CR2032 holders like these.
You'll also need some "SPDT Magnetic Reed Switch" single pole double throw 3-pin reed switches.
Programming
There are a few ways of loading the firmware onto the BLE modules. Let's just use something you likely already own. It boils down to two simple steps.
1) Generate the firmware file using ARM MBed online compiler.
2) Download the firmware onto the nRF51822 BLE module using OpenOCD from a Raspberry Pi.
One of the cool things about ARM MBED is that it's super easy to replicate someone else's project and generate firmware files. For this example, we'll need to generate the sensor firmware and a BLE gateway firmware. Create an account on ARM MBED and then head to these two projects, hit import, and then select the correct platform and compile.
Once you have the gateway and sensor firmware saved to your local drive, you can use a Raspberry Pi and an open source application called OpenOCD to load the MBED binary files into two nRF51822's. You just need to connect 4 wires on the BLE module to the GPIO pins on the Raspberry Pi, and run a few commands in the engineering notes below.
You can use the purple BLE module for the gateway if you want, or use the smaller BLE module for both the sensor and the gateway. Either way, they program the same. Note, you don't need to solder wires on the small BLE module in order to program it. Just poke 22 gauge wires into the through-hole. The wire gauge is enough that it'll make contact and allow you to power and program the module. Only solder wires for I/O you intend to use for the sensor.
The link below are my engineering notes with commands to install OpenOCD, as well as what commands to type in to load the firmware onto nRF51822 BLE modules. If you run into trouble, here's a copy of a Raspberry Pi image that has OpenOCD loaded already. You should have no problems loading the firmware with this image, but use Pi2 or Pi3 (not Pi3+) for this image.
2) Raspberry Pi Image [8GB Image, Jessie]
If you want to do everything from scratch, follow Adafruit's OpenOCD instructions to compile it on the Pi. Once that's done, move the two BLE binary files onto the Pi and program the modules one at a time.
To use OpenOCD, open up two ssh sessions to the Raspberry Pi with the module wired as mentioned. On one SSH window:
cd /usr/local/share/openocd/scripts/interface
sudo openocd -f interface/raspberrypi2-native.cfg -c "transport select swd; set WORKAREASIZE 0" -f target/nrf51.cfg
On the other SSH window, enter this set of commands, where xxxx.hex is the name of the firmware file. If you use my Raspberry Pi image, SMB is enabled so you can throw binaries directly into the shared folder in /media.
cd /usr/local/share/openocd/scripts
telnet 127.0.0.1 4444
halt
nrf51 mass_erase
flash write_image erase /media/xxxx.hex 0
reset
You'll see this as it flashes. Some of the messages sound like errors, but don't worry that's normal.
In the next few steps, I'll show examples of using other sensors with these BLE modules. But the idea is that the set of sensor MBED examples provide a good set of code for this architecture. If you have your own sensors, you can utilize one of the examples as scaffolding and only need to change a few lines.
Assembly
Once we've programmed the modules, it's time to assemble the sensor. There's not much of a schematic to speak of. We're basically wiring the reed switch to the BLE module. Here's a few pictures to help explain how to assemble it.
MQTT
Once that's done, you can test the sensor by monitoring the MQTT topic. Subscribe to all topics and move the magnet around the reed switch.
mosquitto_sub -h localhost -v -t '#'
You'll see something like this:
If you subscribe to all topics from that sensor, you'll see other things like RSSI and battery voltage.
Current Consumption & Battery Life
That's pretty much it for the sensor assembly. One thing to note is that I'm using 3-pin reed switches instead of the much more common 2-pin reed switch. This is to make the sensor more energy efficient. With a 2 pin reed switch, when the magnet is present and the two pins are shorted, the sensor will always consume a small amount of current equal to the battery voltage divided by the internal pull-up resistor. For a 3V battery and 15kOhm pullup resistor, this may be 200uA, which is 50 times more current than the microcontroller sleep current of 4uA, and would reduce the battery life of the sensor to just one month. The 3-pin SPDT reed switch solves this problem by always providing an interrupt that is an open circuit (not shorted) in both situations (magnet present or magnet absent). The BLE module firmware wakes up when reed switch is activated, and it disables the pull-up resistor on the pin that is shorted and sets the interrupt on the other (open circuit) pin. That way, there is no persistent current flow from the pull-up resistor, and we still wake up immediately when the reed switch is activated.
Double checking the current consumption using a scope, things look correct. The reed sensor is only awake for short amount of time when the switch is activated. We're not wasting a lot of time awake. The sleep current is under 4uA. On a single CR2032 battery, even assuming several open/close events a day, we should have a battery life of over 2 years. Notice that BLE advertisement are very short bursts of less than 2ms of transmit time. The cost of transmitting a BLE advertisement is so small that it's often a good strategy to just advertise more often than to come up with a scheme to acknowledge that the beacon is received by the gateway.
So that's the wake-up and first advertisement. To better ensure the packet is received, the firmware not only advertises on all 3 channels, but also multiple times a second for a couple seconds. If I zoom out, you'll see each of the peaks below is a single advertisement on all 3 channels. So you see about three advertisements per second. Each repeated advertisement is the same data. The BLE-MQTT gateway hides these repeated advertisements, so only a single MQTT publish is seen per unique advertisement from a sensor.
Step 3: Visualizing Data, Actionable Events


Once we can get data from a sensor over the air into the Raspberry Pi in the form of MQTT messages, we want to do something with that data.
- Display it on a dashboard (Grafana, OpenHAB)
- Use sensors to turn on lights or adjust other home automation devices (OpenHAB, Home Assistant)
- Send an email or tweet if sensor value meets some criteria (NodeRED)
Home Automation
Let's just pick one of the popular open source home automation platforms like OpenHAB or Home Assistant. I've been a long time OpenHAB user, so I'll use it for the specific examples, but both are similar. They are both programs that can be installed on a Raspberry Pi. They both provide a mechanism of creating dashboards to display MQTT data, which fits very well with what we're doing. But more importantly, they also integrate well with commercial home automation gadgets like Phillips Hue lights or Nest thermostats. Using the scripting system within these platforms, we can subscribe to sensor events, and invoke changes to physical devices like lights and thermostats. Like turn on lights when a door is opened. Or turn down the thermostat when no one is at home (see geolocation step later).
On OpenHAB, you define "items" by giving them names and specifying what MQTT topic that item should be associated to. The wild cards in MQTT provide a lot of flexibility in our distributed gateway architecture. The door or window status can be picked up by any gateway and will update the sensor value. We don't have to specify a specific gateway. This works well with some of the Amazon Buttons we made later that may not be stationary devices. See <demo.items> file in this step.
Once the items are created in OpenHAB, you can put them into the sitemap and the program provides a webpage as well as a mobile app that displays the dashboard.
InfluxDB + Grafana
To view historical data, as well get get fancier visualizations of data, I like to use Influx Database in conjunction with Grafana front end.
The nice folks over at OpenHAB have a pretty good tutorial for setting up InfluxDB and Grafana. Follow this link here for the setup.
https://community.openhab.org/t/influxdb-grafana-p...
Once that's setup, configure telegraf with the <telegraf.conf> configuration file in this step. Telegraf is a high performance MQTT ingestion tool, and it takes the MQTT data and stuffs it into Influx database. Once that's done, we can use the feature rich front end components in Grafana to display sensor data.
Displaying the current status of a door sensor is pretty simple. In Grafana, this is how to get a single state panel to show the open/close status of a door sensor's MQTT topic. Place the MQTT topic corresponding to that BLE sensor in the FROM field.
But seeing the current status isn't all you can do. You can also get a visualization of the door/window activity using the discrete values panel.
It's a really awesome tool. It provides a visual of when the door is open or closed, and also calculates the amount of time the door is in the opened state. Pretty neat!
So that video was kind of awkward. Different platforms have different built-in delays. OpenHAB has pretty short delays, which is why I use it to demonstrate the precision of the distance sensor in later steps. But Grafana has much longer delays. It's not a problem for most dashboard use cases, but for video demonstrations, it's a bit more awkward. Here's another demo clip that uses OpenHAB's dashboard tool to display MQTT data. You can see it's faster to react. I'm using the same sensors, it's just that the delays on OpenHAB are much shorter than Grafana. Grafana provides much more rich data visualization tools, however.
Attachments

Step 4: Problems With BLE


There are two main problems with BLE advertisements: security and range.
Security
One of the problems with using BLE is that anyone can see your data and maybe also spoof it by duplicating the BLE advertisements. This is also known as a replay attack. To try to protect or at least detect when spoofing happens, the sensors transmit a byte that represents the number of seconds since the sensor was powered up, with some periodicity. The BLE gateway keeps track of this value, and can validate whether a certain transmission has this correct time signature inside the encrypted data. You can replicate spoofing by removing the battery from a sensor, waiting a few seconds, and then putting it back in and then making the reed switch activate. You'll see something like this come in through the MQTT stream for that sensor.
When spoofing events happen, they come in as a /spoof topic. You can detect spoofing for particular sensor by subscribing to
mosquitto_sub -h localhost -v -t '/+/+/fff7cea88a8b/spoof/#'
Or you can subscribe to ANY spoofing event by
mosquitto_sub -h localhost -v -t '/+/+/+/spoof/#'
Realistically, you wouldn't use mosquitto to systematically capture these events. You'd use Node-RED or pack it into InfluxDB as an event to aggregate (more on this later). But the point is that the design of the MQTT topic names makes it easy to monitor and alarm against spoofing.
My effort at replay attack prevention is only just OK. Starting conditions and the need to simplify things limits how secure the BLE sensors are. Under this algorithm, it's still possible to spoof sensors if someone captures sensor data and replays it with exactly the same timing four times in a row. Since I need some way to let sensors back into the system after a battery change, I used 3 consecutive advertisements that have consistent time signatures to indicate that this sensor is legit. The screen shot below shows that spoofed sensor eventually let back into the system. The nice feature is that it's easy to detect when this happens and at least be informed.
I have a note with a much longer explanation of the spoof avoidance algorithm in this mBed notebook.. I'm not sure if it's a better explanation, but it is longer. The link also has a very complete breakdown of the bytes inside an advertisement.
Range
BLE has very limited wireless range. These particular modules only output at 4dB. Certainly nothing to write home about. To compensate for this limited range, the set of BLE-WiFi gateways act as a distributed network of gateways that use MQTT to aggregate sensor data. It works pretty well for typical home automation situations; the BLE-WiFi Gateway using the ESP8266 is small enough that you can stuff it into a few places around the house and it won't get in the way or look super ugly.
But what if WiFi isn't far enough? For example, if you have a farm with a barn that's pretty far away. We'll need some other radio technology. Luckily, there are these RFM95W LoRa modules from HopeRF. They can be brought with an integrated Arduino 32U4 for about $16 each. The data format used for BLE can be replicated with LoRa to make a BLE-to-LoRa bridge that will extend the range of BLE.We just need new code for a LoRa-MQTT gateway and the BLE-LoRa "bridge".
I happen to be using an Adafruit version of the LoRa 32U4 module, but I also have the generic Aliexpress version and I know the Aliexpress versions of the 32U4 works just like the Adafruit one, complete with LiPo battery charging circuit and all.
Since the BLE-LoRa bridge is using Arduino hardware, you can use the Arduino IDE to program the 32U4 modules.
1) BLE-LoRa Bridge:
https://github.com/tsaitsai/LoRa-Tooth/blob/master...
For the BLE module, use the same MBed BLE gateway code previously mentioned. It's just the Arduino code for the 32U4 that is new.
2) LoRa-MQTT Gateway:
https://github.com/tsaitsai/LoRa-Tooth/blob/master...
The LoRa-MQTT gateway works much like the BLE-MQTT gateway does, but this time just replacing the BLE module with an Arduino and a raw RFM95W LoRa radio. The Arduino in this case is a Pro-mini clone. The code for the gateway also works if you just want to replace the Pro-mini and RFM95W with the 32U4 LoRa module.
With these LoRa modules, the range between the BLE-LoRa bridge and the MQTT gateway can be as much as 1500ft without having to do anything special (just wire antenna placed at table height). I used this GPS LoRa sketch along with the 32U4 LoRa module to test range.
Data from BLE modules coming in through the LoRa bridge show up with a /yyy/ topic name instead of a /ble/ topic name, but otherwise, everything works the same. It's a slight issue with Grafana because Grafana doesn't understand the idea of wildcards in MQTT topic names. Using the Node-RED flow in Step 8, I actually remove the specifics of where the sensor data comes from, and generate a generic MQTT sensor topic so that it's easier to consume that data in Grafana. In other platforms like OpenHAB, you can use wildcards to ignore the first level that indicates ble or LoRa, sensor data is easier to display.
Step 5: Example: Temperature Sensors


Now that we've covered the details of downloading firmware and understand just how awesomely simple it is to use MBed for firmware generation, we can go on to build more sensors without having to cover every little step.
Temperature sensors that work over I2C are pretty useful. Two of these common sensors are the TMP102 and the Si7021 (which also has humidity sensing). They're only a few dollars on ebay/aliexpress. They both run in the same voltage range as the nRF51822, and all that's needed is to hook up the I2C lines.
Depending on the alignment of the SCL and SDA pins on the sensor to the BLE module, modify code so you don't have to physically cross the wires to hook up the I2C pins.
The MBed project to compile is listed here:
1) TMP102:
https://os.mbed.com/users/electronichamsters/code/...
2) Si7021 w/ light sensor:
https://os.mbed.com/users/electronichamsters/code/...
Here's what the TMP102 sensor looks like.
One interesting thing I learned about the digital temperature sensors is that they take different amounts of time to make sensor readings. The TMP102 only takes about 4ms. The Si7021 takes 21ms. At 10 minute transmit intervals, I think the Si7021 can still provide 2 years of battery life though.
Because the battery voltage is part of the BLE advertisement data, we can use Grafana to help us monitor the battery status of the sensors. See the chart below. One of the kid's room temperature sensors is a Si7021 and the other is a TMP102. You can see they behave slightly differently (more jigger on one). I've been doing a battery life test by having the sensors take readings and sending out temperature data every 30 seconds (green) and 15 seconds (orange). They've been running this battery test since last October (7 months ago), and the battery voltages are still at 2.68V and 2.93V. In normal conditions, you probably won't need temperature data so frequently, and I expect a single CR2032 should last more than 2 years.
The cool thing about collecting temperature data and saving it to InfluxDB is that you can make charts and start seeing patterns. During a winter day, this is what we see for one of the bedrooms.
Besides seeing the temperature go up and down with room activity, you can also see the temperature ripple from the furnace cycling on/off about twice an hour. Pretty cool!
There are lots of things you can build with sensors. The set of MBed code in this project provides a scaffolding of code to make it easy to change a few things specific to the sensor or your particular use case. But these changes can be kept pretty small and still enable you to take advantage of the rest of the features in the architecture.
Step 6: Dog Food Sensor


One of the problems my family runs into is that we sometimes forget if we fed the dog. You start asking yourself "I remember feeding the dog, but was that yesterday or today?" And Cody has kind of figured out that if he just acts hungry, he has a chance of getting two breakfasts.
A way to solve this problem is to just put a BLE module with a tilt switch to sense when the food container is opened. While we're at it, we can also add some other sensors into this dog food gadget to provide more information.
The VL6180 distance module in this dog food sensor is an I2C time of flight sensor that measure the centimeters distance to object in front of the sensor. The sensor is very low power, but also has limited range. It can sense about 20cm. It's not quite far enough to the bottom of the dog food container, but it's close enough. You can find it on ebay/Aliexpress for about $6 each.
I'm using the same nRF51822 BLE module as other sensors, but with this slightly modified mBed code to take readings from the distance sensor:
https://os.mbed.com/users/electronichamsters/code/...
Hardware wise, the major difference between this build and the temperature sensors is that I'm using a 2.8V MCP1702 low current regulator. The distance sensor requires a regulated 2.8V source, so it makes sense to use two 3V batteries in series to get 6V input to the regulator. That way, we can fully drain the battery down before the regulator input voltage is too low to power the regulator. See example circuit above for the regulator wiring.
The dog food sensor uses a tilt switch to wake the sensor from sleep. It then waits until the tilt switch is opened up again (indicating the top is placed back onto the food container), and wait some more time before taking a reading and transmitting the distance. The Grafana panel interprets this transmission as a feeding, and keeps track of the time since the last transmission.
I'm using Node-RED to scale the sensor's cm value into percent dog food.
Then I display the value of the percent as well as the time since it was last received. This is done with the single Grafana panels. I really like how Grafana makes this so easy.
Step 7: "Analog" Window Sensor


With the open/close sensors, we can only tell if a window is closed or not closed. But sometimes we want to know if it's wide open or just slightly opened. I often leave windows slightly opened if it's raining because I like the smell, but I don't want the windows opened so far that rain gets in. So the distance sensor from the dog food container in the last step is perfect for this. Beyond 20cm, I can consider the window wide opened.
The mbed program for the window sensor is here:
https://os.mbed.com/users/electronichamsters/code/...
I'm using the tilt sensor to increase the sensor reading and transmit frequency for a short period of time. So, if you open/close the windows with much enthusiasm, the tilt switch will wake the BLE module and the dashboard will display the distance right away. But the sensor also takes regular readings every 10 minutes if the tilt sensor isn't activated, so the dashboard gets updated eventually.
Realistically, I would probably just show the single stat for "closed, gap, opened" rather than the centimeter measurement, but I'm showing both in the demo so you get a sense of how it works. The relevant Grafana settings are in the screenshots above.
Here's a quick video of the window sensor with a ruler to show how accurate it is. It seems to be within 1 cm across the range. The dashboard is an OpenHAB dashboard that's just subscribing to the distance MQTT topic.
Step 8: Geolocation - Which Room Does Your Pet Dog/Cat Hang Out In?


Wouldn't it be kinda neat to be able to track which rooms your dog or cat hangs out in when you're gone? You can use a video camera, but it's not the same as getting a graph that breaks down how long in each room they hang out in, and how often the move about, and giving a visual sense of their day.
Because of the limited range of the BLE sensors, we're using several BLE-MQTT gateways to ensure we capture the data. But we can also use this architectural feature for geolocation. Each BLE-MQTT gateway is reporting the RSSI of the sensor data it receives. We can use Node-RED to gather the highest RSSI value, and publish that back as MQTT to be displayed as a "Discrete" panel in Grafana. The discrete chart panel in Grafana is great. It automatically tells you how much time the dog/cat spends near each gateway, and gives a visual sense of how much they move around (probably not much). This can be useful for other purposes too, I'm just using a dog as an example. The the chart below, you can see I took Cody out for a walk at around 9:20PM.
We'll start with the actual hardware and move on to the software. The best BLE module to use is this "nRF51822 Beacon" module. They're about $6 and come with a handy plastic case that can be attached to a keychain or a dog/cat collar.
They're a bit more awkward to program, but the same method can be used as step 2, you just might need some clips.
The mbed program is here:
https://os.mbed.com/users/electronichamsters/code/...
The program transmits a beacon every 30 seconds. BLE advertisements are so short and consume very little power. Even advertising once every 30 seconds, the battery life for the beacon is probably over two years. Since there's also a button on this beacon, I also implement code for a long press and short press that causes the BLE module to transmit a value (0 or 1 depending on how long you hold the button). It's all in the same firmware.
This is what the MQTT stream of RSSI values looks like.
That's the hardware and firmware. Now we use Node-RED to keep track of which gateway the beacon is close to. The Node-RED flow is in the text file of the media files stored with this step. Here's what the flow looks like:
The node uses the fact that gateway location is a friendly name for BLE-MQTT wifi gateways. It subscribes to all
/ble/+/XXYYZZ/rssi
topics and takes the friendly gateway name and stores it off. Every 5 minutes, it publishes the gateway name to a location topic for that XXYYZZ mac address.
/g/g/f2a2df72de8a/location
Here's the Node-RED node publishing the locations every 5 minutes.
On Grafana, we just need to display that topic name and the payload which is a string representing the gateway name. Grafana automatically takes care of parsing out the strings and grouping the values. In the event that none of the RSSI values are above the threshold set in Node-RED, the initial condition of "Nowhere" as the location string gets published. That's how you can tell the dog wasn't near the house and is probably out for a walk.
This geolocation of BLE beacons works for all the bluetooth sensors in this project. It's just that doors and windows and dog food containers don't move around, so there's not much point in charting their locations. But in our hypothetical situation of using LoRa to bridge BLE sensors at a barn that's far away from a farm house, this geolocation still works. So, for example, we can track if a farm cat is in the house somewhere or at the barn, or if it hasn't been seen in either location for a while and we should start to worry.
Other Uses
Aside from being able to track a shy cat, there's other potential applications for reliable location data. For example, you can stick the $5 beacon under your bike seat, and set Node-RED to email you if the bike leaves the garage at odd times. Or increase the Beacon frequency to 10 seconds and maybe use it to automate turning on lights or unlocking doors when you (or your car) comes home. I've seen people use wifi or apps on their smart phones to do this kind of geolocation, but the use of beacons is a more reliable approach than mobile apps that have variable responsiveness when running in the background. Home automation platforms like OpenHAB and Home Assistant excel at integration with commercial devices, and they also are able to talk MQTT. Being able to program your own sensors and beacons and do geolocation makes the entire home automation ecosystem much more capable.
"Amazon Button"
The button on the beacon is pretty useful too. The plastic case that comes with it is flexible, and pressing on it will cause the case to flex in and depress the button. It's pretty much like an Amazon Button that you can use with Node-RED to interface with other services. You can long press or short press the button to send different messages to Twitter or send email. You can stick it in the kid's bedroom so they have a button to press to ask for help - by playing an audio clip from a Raspberry Pi in the living room for example. Since it's MQTT, any home automation system that can talk MQTT, like OpenHAB or Home Assistant, can use this button to turn lights on/off, play music from Sonos, etc.
Attachments
Step 9: System Performance


It's sometimes hard to tell how well an architecture will perform until it's been built and tested. Performance in this case means what percentage of sensor transmits do we actually capture into InfluxDB. There's a few things that can go wrong to cause us to miss data.
1) Signal Lost: BLE signal from sensor never makes it to the gateway nRF51822 module. Gateway could just be too far away, or there was signal interference at the time the sensor was transmitting.
2) MQTT Publish Failure: The ESP8266 fails to publish the sensor data to Mosquitto MQTT broker. It's working over WiFi, blips can happen. I'm still using QoS 0 for the ESP8266's MQTT client, so I'm not guaranteeing successful publish events.
3) Ingestion Performance: Telegraph might not be fast enough to receive and write to database given multiple gateways pushing data to MQTT broker
Each BLE beacon includes a byte for "count" that increments with every new transmit. I haven't automated a way to calculate this, but if I download the transmit count value, I can look for non-consecutive counts in the database. Visually, it looks like this.
The slope represents how often the different sensors are transmitting. I should expect to see regularly spaced points incrementing by one if I zoom way in.
If I look at the count data from a sensor that's far away from the gateway, I see something like this. There are gaps in the count value, indicating some transmissions weren't captured by that gateway.
After downloading the data and counting up the missed transmissions, I get these results for 4 sensors close to their gateway. Out of curiosity, I also repeated the exercise for a sensor and a far away gateway.
The result is kind of what I expect. Sensors in the same room have no problems being seen by the gateway and the data makes its way through to the database. The 522E sensor has a miss percentage of almost 1%, so that might be concerning if it was a door/window sensor that I'm relying on to do alarming. Performance degrades fast when I'm trying to make it across the house (2 rooms away).
The mBED programs for the sensors have somewhat arbitrary advertisement lengths and frequencies. For things like buttons and reed switch sensor, it would make sense to extend the advertisement period and increase the advertisement frequency (that is, how many advertisements per second and for how long to advertise). This would improve the chances that a gateway will see the BLE beacon.
Tic_Stop_Adv.attach(stop_adv_Callback, 3); //increase 3 to 4 or 5 seconds
//decrease this from 900 to say....500 to make more advertisement ticks
ble.gap().setAdvertisingInterval(900);
It would also help to place the gateway at a higher elevation. Worst case, I might have to add another gateway to ensure good coverage. Antenna orientation and placement might also be important. I tried to make the sensors so that the battery is not going to be in between the antenna and the gateway. That's something you may want to pay attention to when making sensors.
The important thing to get out of this is that the weakest link seems to be Bluetooth reception, which can be solved. So far, I don't see any issues with the architecture itself.
Heartbeat
The mBed example code for all the sensors transmit a heartbeat every X minutes. For temperature sensors, the heartbeat basically defines how often you want the temperature/humidity data.
const uint16_t Periodic_Update_Seconds = 900; //number of seconds between periodic I/O status re-transmits
For door/window sensors, the heartbeat provides the same data about the magnet position as when the sensor is activated, but I want to differentiate between a heartbeat and actual door/window activity. To do this, every heartbeat transmission has a '/p' added to the end of the JSON for that sensor value. So, when a magnetic reed switch sensor sees activity (due to pin level interrupt from actual door/window activity), the MQTT topic name is this:
/ble/gateway/XXYYZZ/mag 0
or
/ble/gateway/XXYYZZ/mag 1
That same sensor will also periodically report the magnet position every X seconds, even if there was no door activity. And these periodic heartbeats come in as
/ble/gateway/XXYYZZ/mag/p 0
or
/ble/gateway/XXYYZZ/mag/p 1
By subscribing to /ble/gateway/XXYYZZ/mag/#, you'll get the latest position.
By subscribing to /ble/gateway/XXYYZZ/mag, you'll get only activities.
And you can monitor the health of a sensor to ensure it's reporting at least every X heartbeat seconds by subscribing to /ble/gateway/XXYYZZ/mag/#.
Battery Life
Here's a summary of estimated battery life for the different sensors I've built. I'm using Digi's battery life excel sheet and modified it a bit for my own purpose. The data captures the measured sleep current, wake current, and wake duration, as well as some assumptions about how frequently I expect these sensors to read and transmit data. I'm pretty conservative, assuming a 240mAh rated coin cell can provide 70% of the rated capacity. Most of the sensors come out to more than 2 years battery life, with the exception of the dog beacon where I'm assuming it transmits every 30 seconds for geolocation purposes. If I change the assumption of 30 second beacons to 60 second beacons, the battery life changes from 1.8 years to 2.5 years. As a gut check, my months long real-world testing doesn't contradict these estimates.
Step 10: Random Stuff That Is All Your Own


Sometimes it's easy to get lost in the details and lose track of the purpose. Being able to make your own gadgets is really fun. Being able to do it with minimal fuss and minimal expense is awesome. I really just want to maximize makability and manage the complexity of IoT projects. It's possible to make projects work without fully understanding every little bit at first, and that's a good way to learn.
In the end, this project boils down to:
- An easy way to re-program modules to build stuff to fit your own usecase (mbed with the scaffolding code)
- Cool open source tools to visualize data (Grafana)
- Easy ways to integrate with services and other devices (Node-RED, OpenHAB, MQTT)
- Inexpensive, accessible hardware
This Bluetooth pet location beacon doubles as a voice activated light switch. The wake-up-word for mine happens to be "Cody".
There's a ton of other things that can be built. I realize you can probably buy a Zigbee door sensor for $10 on a good day, and just pair it with one of the off-the-shelf home automation hubs. But this project provides much more capability than that. You can build NICE LOOKING one-off sensors to solve problems that can't be solved with off-the-shelf home automation products. And do so without having to deal with horrible development tools that plague most of embedded systems development.
The Bluetooth Beacon with the button built in is pretty handy. You can subscribe to the long/short presses and use Node-RED to do pretty much anything - send a text message for help, send an email, turn on lights, etc...
Back when I had my first kid and we were just returning home from the hospital, it seem like the most important thing was to keep track of wet and dirty diapers. I wish I had that button back then. Long press for dirty diaper, short press for wet diaper.
And I would want to make sure to archive the diaper changing schedule as a CSV, in case it turns out to be useful in the future.

Participated in the
Microcontroller Contest


