

Introduction: How to Use I2c With LCD


Hi guys!! I'm sridhar janardhan back with another tutorials.This tutorials is very useful for people who wants to be a electronics hobbyist.Usually the interface of LCD to a arduino is a hectic as it has many connection and also spoils the beauty of the circuit by it's ugly wire.To avoid these stuffs I2C is used.It requires 5v To get powered which can be provided by Uno itself.Instead numerous wire requires in LCD here only four wires are enough to finish the connection and there is embedded pot to control the contrast of the Display.
So let me tell you components required for the ibles.
Step 1: Componets Required:


The components required are:
- Arduino Uno
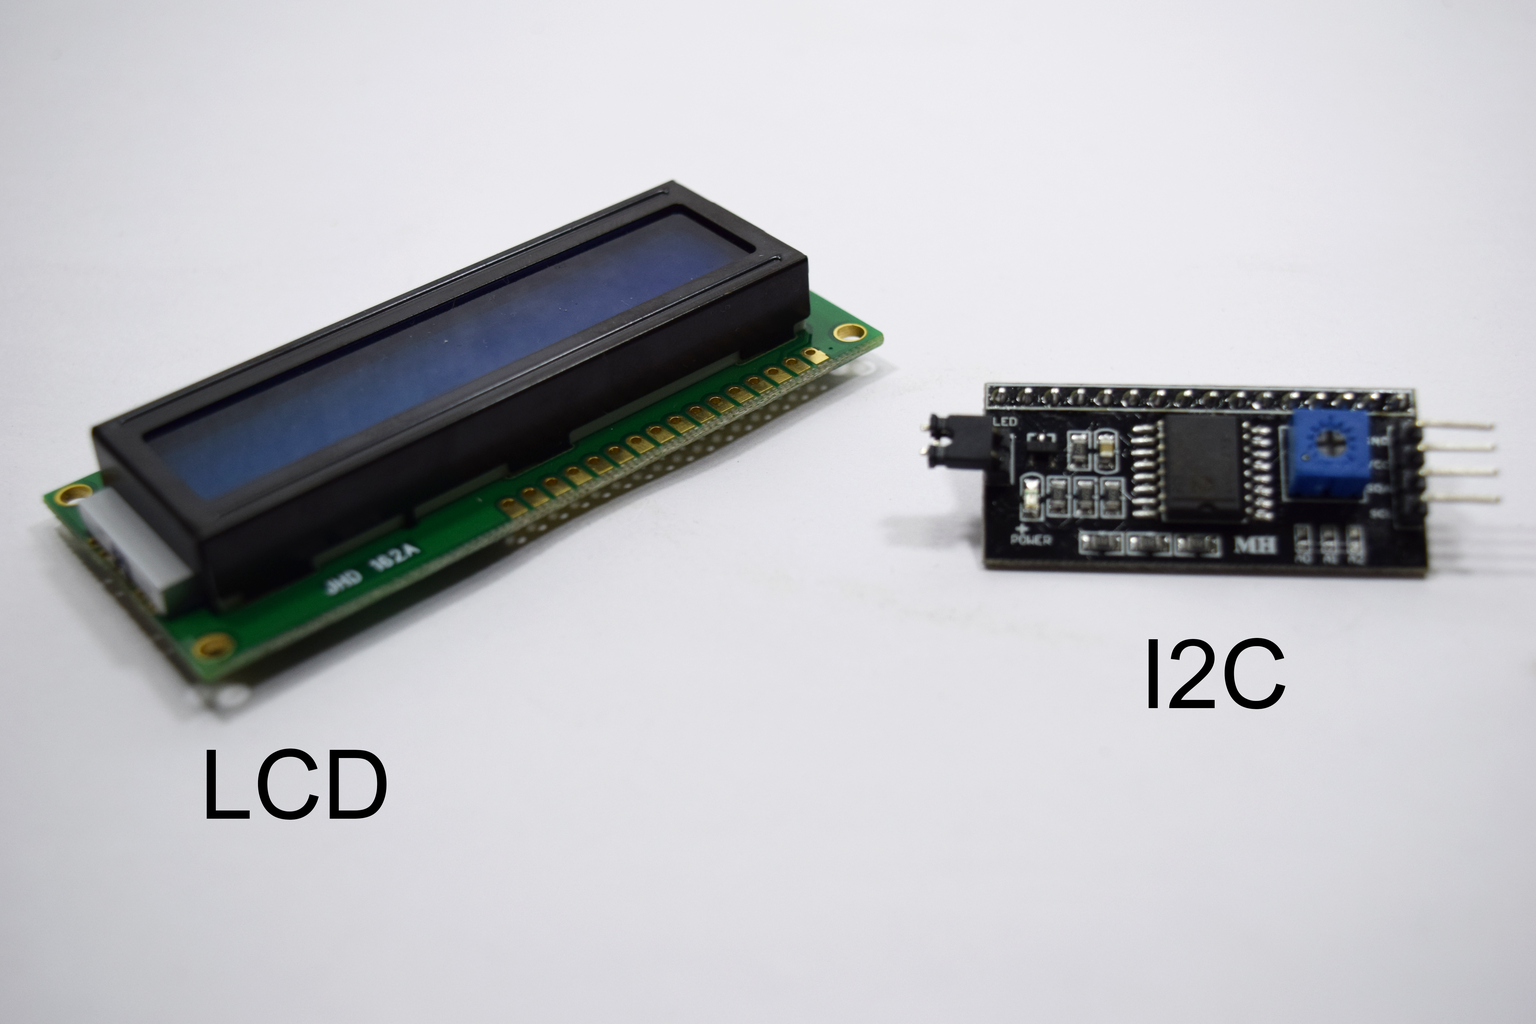
- LCD compatible to arduino
- I2c
- Jumper wire
- Soldering gun
- Soldering lead
- Breadboad
Before the connection let me explain you the four pins of the I2C.
Step 2: Pin Description of I2C:

The pins of the I2C are:
- VCC Pin - the pin that requires to power up the circuit
- GND pin - the pin that required to keep all the component in the circuit grounded.
- SDA pin - this is a data line where the transfer of characters take place.
- SCL pin - this is a clock line synchronizing the transfer of character.
Now let's solder the I2c to the LCD
Step 3: Soldering
The pins of the I2c are neatly soldered into the respective slots of the LCD and make sure no lead is in contact with the adjacent lead,This may short the lcd circuit and burn the whole circuit.
Step 4: Connection of the LCD


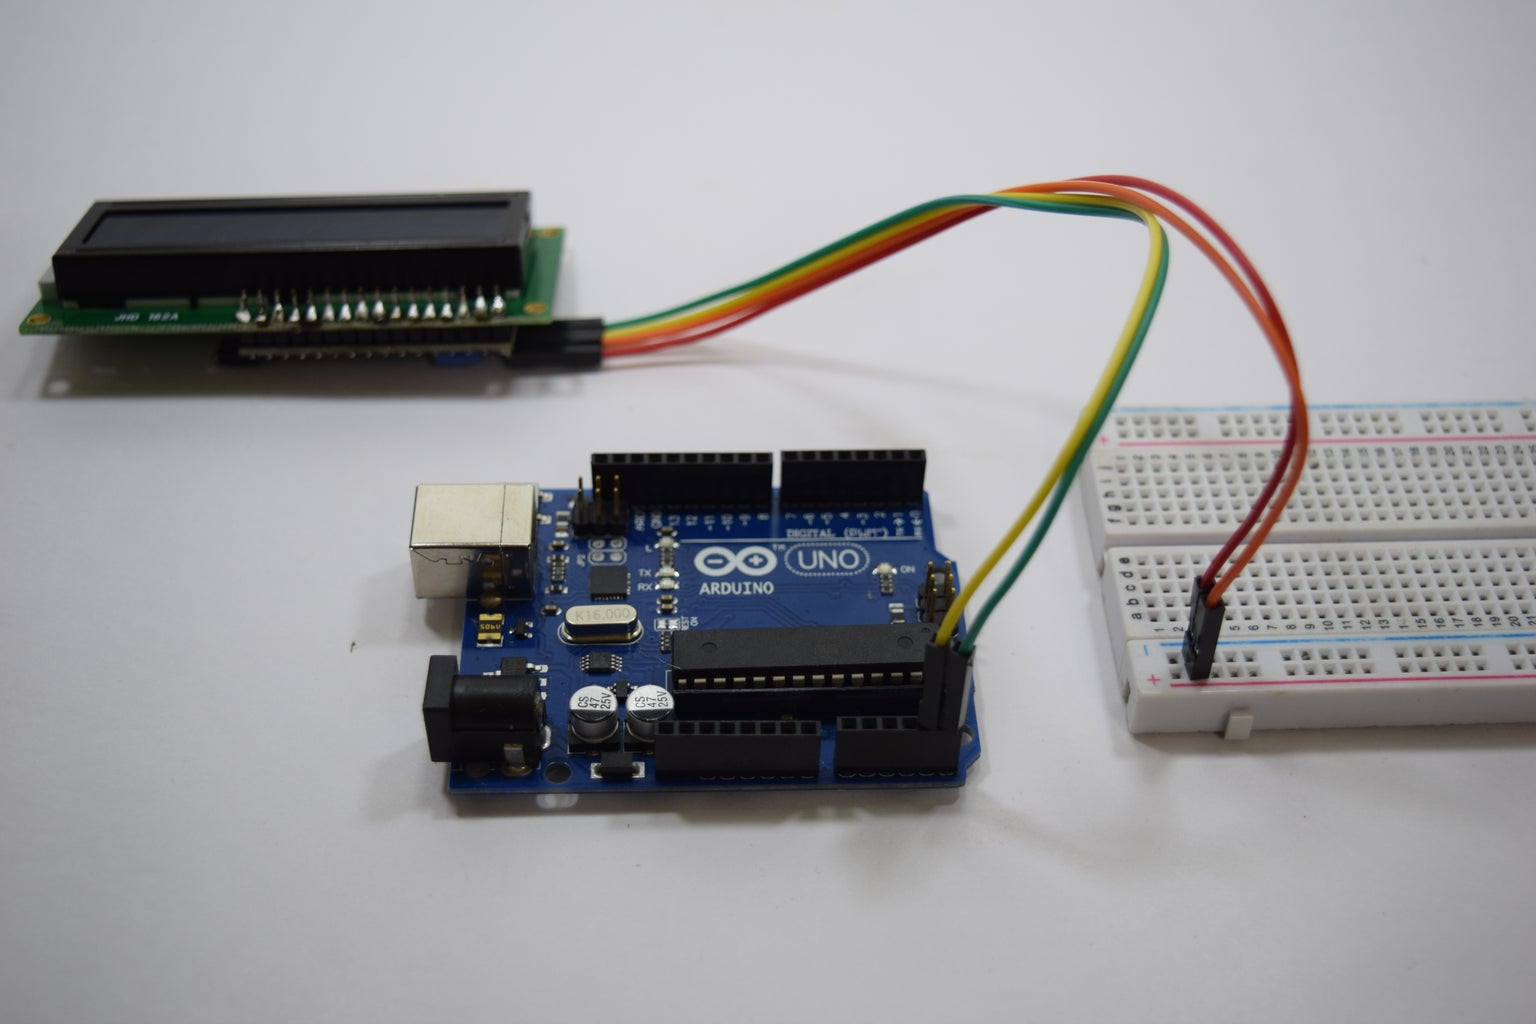
The connection of the LCD are as follows
- VCC pin to 5v pin of the arduino
- GND pin to GND pin of the Arduino
- SDK to arduino pin A0
- SCK to arduino pin A1
Step 5: Coding:
include "Wire.h"
#include "LCD.h"
#include "LiquidCrystal_I2C.h"
LiquidCrystal_I2C lcd(0x27,2,1,0,4,5,6,7);
void setup() {
lcd.begin (16,2);
lcd.setBacklightPin(3,POSITIVE);
lcd.setBacklight(HIGH);
lcd.print("Hello!");
lcd.setCursor(0,1);
lcd.print("Peep");
}
void loop() { }

Participated in the
Makerspace Contest 2017


