

Introduction: Arduino Based Nextion Touch Controls


A friend was looking for a cool solution to control the HVAC (heating, ventilation, air condition) of his car via touch screen and Arduino. The idea was inpired by an older project of me about the interior control of a stretch limousine, but it should be smaller and easier.
I've taken a Nextion touch screen again for this project and connected them directely with an Arduino UNO. All pictures and other data of the GUI is stored in the Nextion touch itself. It's very easy to connect these touch screens to a microcontroller (in our case Arduino) via the UART.
This small instructable will show you how simple you can realise a project with Nextion touch screens and Arduino for different purproses...
Step 1: Tools & Materials
Hardware
- Nextion touchscreen (optional you can do the first test in the simulator)
- Arduino UNO or Nano
- Breadboard for first experiments / tests
Software
- Arduino IDE
Step 2: Preparing the Breadboard to Test and Edit the Firmware
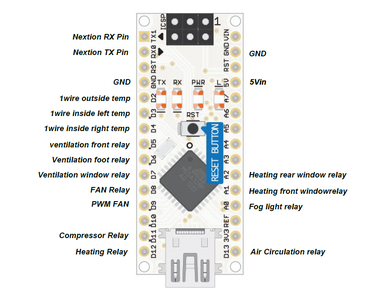
The hardware is very simple. In our project the hardware was build by my friend. For first tests you can build a simple test circuit on a breadboard with LEDs. Please connect the LEDs with 220R resistors to the Arduino and ground.
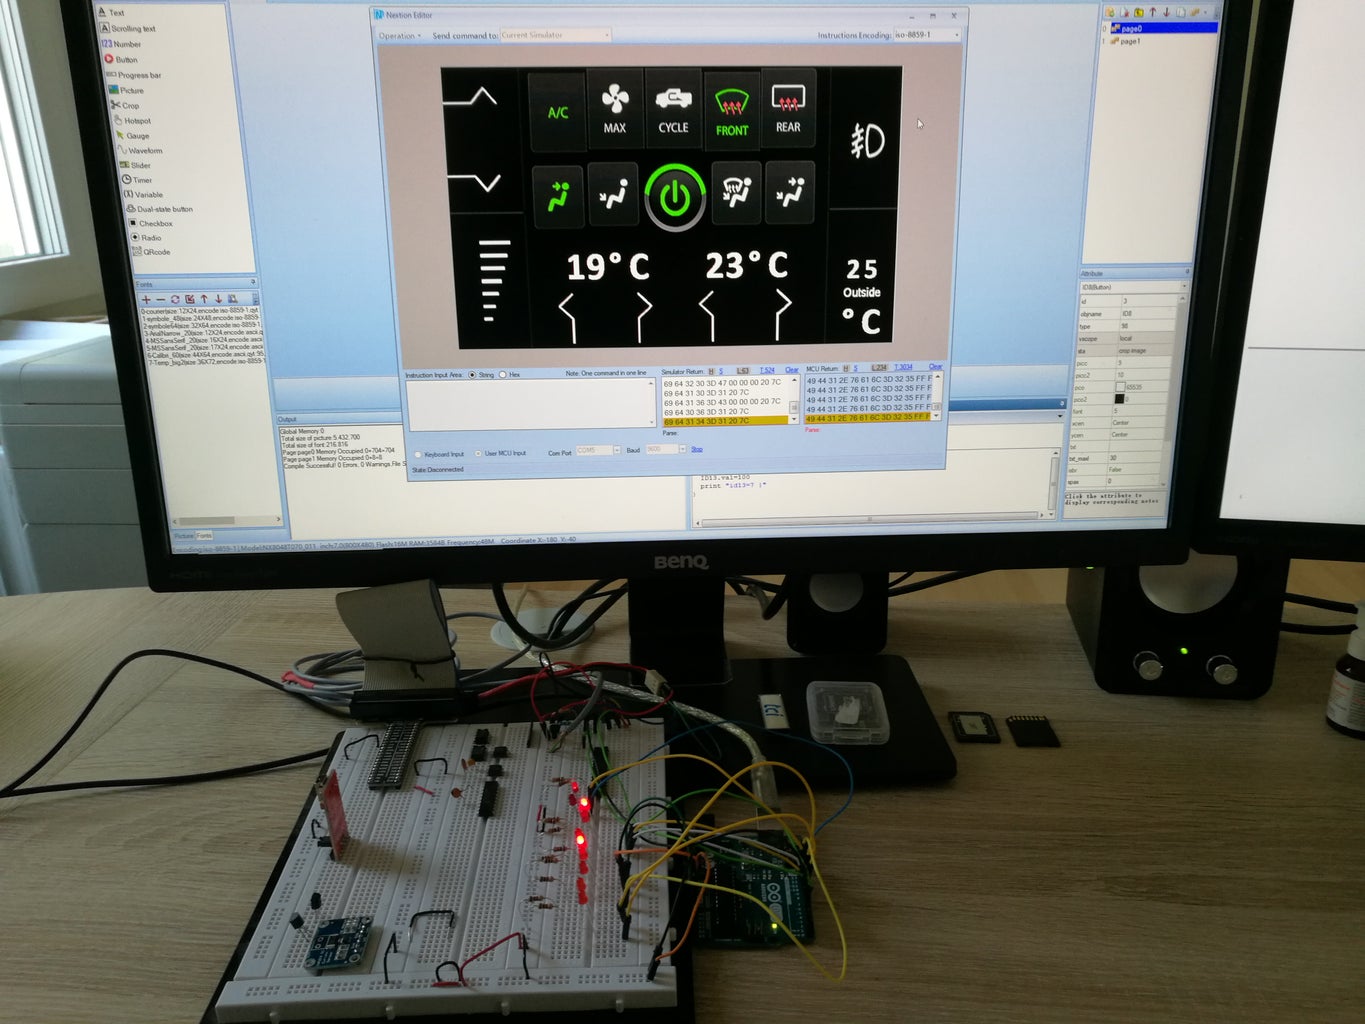
Step 3: Connecting the Nextion Touch or Simulator
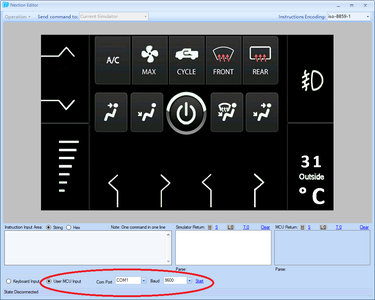
You can directely connect the Nextion touch via the UART pins of the Arduino. For the first test you can start without any nextion touch, because the editor comes with a really good simulator. You can connect the Arduino in this case via USB with your PC.
Step 4: My Firmware
For your steps you can start with my firmware...


